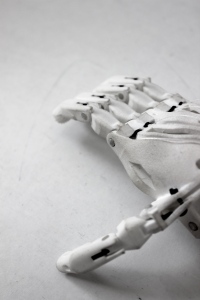
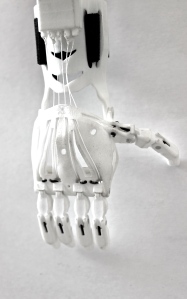
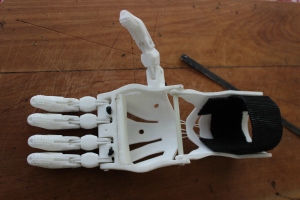
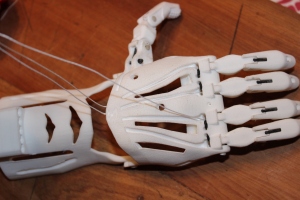
Although the assessment is coming to an end I am still going to carry on with this project outside of class. I really want to be able to make sure the girl who doesn’t have a right hand gets one. I have been in contact with the family over the weekend and they are going to send me her measurements so I can make sure she gets a hand that fits perfectly. I have been talking to Ray and he is still going to help me with making a new hand for this girl. We have decided that we will make the hand so that it is about half a size up from what the girl requires, this way it will fit her for longer and in the meantime she can just add extra padding to make it fit her perfectly. I am going to order some ABS Filament which is the material that has been tested and proven the most successful to date when printing pieces for these prosthetic hands. The girl was pretty keen for a rainbow hand (image shown below that I drew up) but has decided she would just like a bright pink one now instead. White is such an impractical colour and will just get dirty so easily as I have already discovered. I am also going to order some glow in the dark ABS Filament just to print some pieces for fun in it to see what the result ends up turning out like. I don’t need to order any more materials for assembling it as I have most of them from the first attempt as I wasn’t able to use most of them. To save on cost I am not going to be getting these pieces printed by shapeways. Since ordering the pieces for my first attempt I have done some more research. Just this last week I met a guy locally who lives in New Plymouth and is an architect. He owns a 3D printer and uses it to print pieces to make miniatures of his designs that he is developing. He has offered to print all the pieces for us with the Filament that I provide and also help me to get the pieces the correct size. This will be so much better because we will be able to evaluate the pieces as they print and make adjustments as we require. The aim is to have this hand completed and given to this 6 1/2 year old by christmas. Depending on the result of this I may consider making something more out of this or creating my own design for a prosthetic hand in the future.
Collaborative Projects 2
“Alone we can do so little; together we can do so much” ― Helen Keller
Category Archives: Project Two
Reflection
Overall I have had a lot of fun working on this project. I have learn’t so much. At the beginning I was hoping to maybe get to 3D print something small that might have been semi related to prosthetics or not at all. I never expected to get the opportunity to make my own prosthetic hand. I have really enjoyed collaborating with both e-NABLE and Ray Markham. I am still keeping up to date with e-NABLES blog and am hoping that some day I might get to go over and visit the building where it all happens. Ray has been awesome. His knowledge and enthusiasm has definitely helped getting this project to where it is now. It is a little bit disappointing that the hand didn’t quite come together as we had hoped it might. It would have just been such a great feeling to see a child putting it to use but at the same time it was an experiment and I did choose to try a material that had not yet been used for these prosthetic hands. It was all abit of a trial and error and seeing just how far this particular design could be pushed material wise. At the beginning I said that the thing that most amazed me about this technology was that anyone was capable of making themselves a prosthetic hand and that the 3D printed prosthetic hand could provide a child better grip and just as much movement if not more than a normal prosthetic hand. This is what I wanted to show. I believe that I have still done this. There are so many things I would have done differently if I had more time but because I had limited time and only discovered e-Nable half way through I had to make quick decisions to ensure materials etc would arrive on time. I have been looking at this project as just the beginning (research/ prototype/ testing stage) of something much bigger. This project has made me appreciate ‘collaboration’ and also this amazing technology that we have available to us.
Hand in action
Today I got a 5 year old to try on the hand and it fit perfectly. Unfortunately the palm got printed the wrong size so it will be too small for the child I was hoping to give it too. I asked Pearl the child who was wearing the hand for me to do a movement with the hand just to get the feeling of how it works and then I would start taking photos of her doing different things. Unfortunately after a few times of flexing the wrist the strings came through the holes at the top of two fingers. I quickly re threaded them and made the knots bigger but the little hex pieces now don’t fit properly in the tensioner block because the holes have stripped away and become to big to use. So I haven’t been able to take photos of it being used which is super disappointing. I have glued some of it together so hopefully that will hold everything in place for the presentation just for the sake of showing what it should look like. I will be able to show the class how it operates but not very much because it will brake again.
The material I have used has been the issue as it stripes away to easily. The material ‘flakes’ off every time the cord rubs against it. Because of this I haven’t been able to get the result I was hoping for and I haven’t been able to show the hand used to its full potential.
Final Touches
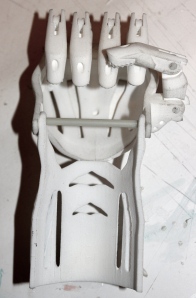
Now that the hand is all assembled I have attached the velcro which will be used to attach the hand to the child’s arm. I used meths to clean the hand as much as I could. I still need to cut the rod off but am leaving it right to the last minute because once it is gone it will be very flexible and harder to clean or adjust things if I need too. With the rod being there it is creating abit of extra support.
Putting the hand together: part two
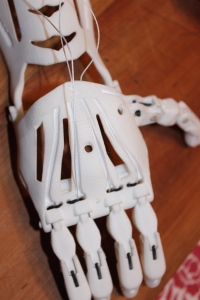
Today we finished putting all the cords through. Thankfully the white non-stretchy cord was very thin so it didn’t matter so much that they holes weren’t very big. This cord had to go through the hole that’s right at the top of each finger, down through the channel along through into another channel in the bottom side of the hand and then pulled up so it goes along through the paths that you can see on the top of the palm. The cord then had to fit through theses very very tiny holes and then attached to the little hex pieces that fit into the tensioner block. This cord was much easier to thread because it wasn’t as thick until we got to the very tiny holes that the cord had to be pulled through at the top of the palm. We could only just fit a very thin needle through. We tried a number of different ways for puling the cord through but didn’t have luck. We broke a lot of needles and pins trying. I spent ages picking away at the hole trying to make it bigger and eventually got the cord through each of the holes. This probably took the longest out of everything to do.
The next step was to tie the cord through the little hex pieces that fit in the tensioner block and the use the screws to adjust the tension of them individually as needed. The hand is all put together now!!!!!!!
Putting the hand together: Part One
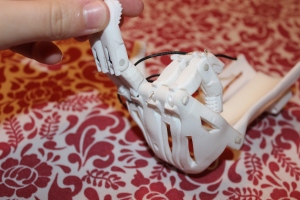
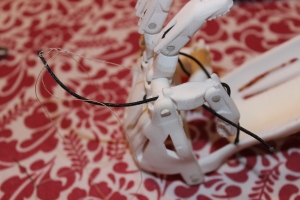
This has been such a painful process. Putting the hand together was suppose to be the quickest and most straightforward part but it has ended up being the most difficult. I thought the screws were going to be the main problem and the cords really easy but the cords have been such a mission. Because the hand is so small the holes are really small too. and you can’t drill the holes bigger because the holes/ channels run through the fingers. I ended up spending ages cleaning out the holes with a pin getting rid of all the powdery stuff that clogs the channels up. With some help I came up with a bit of a solution for threading the cords through more easily. I found a pin that fitted through the holes and the attached some thread to the pin and then the other end of the thread to the actual cord I needed and using the pin i pulled it all through. It made everything so much easier and faster.
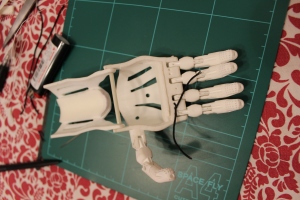
Here are some photos of putting the stretchy cord through the fingers and tying it all off. The stretchy cord goes through the hole where the ‘finger nail’ is then down through another hole that runs the cord through the finger phalange and then the cord comes out of a hole and then you do the same for the next finger and tie the two off together.
Some Success
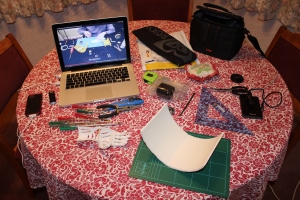
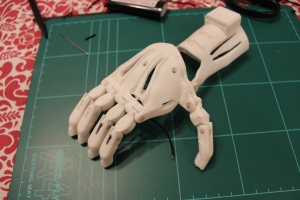
We weren’t able to make the holes bigger in the end to fit the smallest screw we could find because there wasn’t enough material around them for support. So instead we have used the original holes and come up with a new solution. We have used some coated fibre glass rod to act in as the ‘screws’ that hold the different pieces together. The bits of rod have been cut to the exact size and are wedge in the holes but have enough room for the joints to be able to move smoothly. It has worked out real nice and the fibre glass blends in with the plastic so it actually looks nice and tidy rather than having these bulky screws showing. We will still be using some screws to attach the last couple of bits (foam, velcro and tensioner block) but they shouldn’t make the hand look to clunky. The piece of rod you can see going straight across the palm does still need to be cut but we are going to leave this right till the end.
Still to do:
– Put the foam padding in the palm and gauntlet.
– Sew and screw the velcro on.
– Put the cords through and screws into the tensioner block.
– Check tension and alter if needed.
– Clean the hand.
– Take photos.
Goal is to have this all completed by the end of the weekend.
Progress update
Getting the holes bigger is proving to be more difficult than we originally thought but we still have a few more options to try. Once we have the holes sorted actually putting the hand together is reasonably straight forward. There are a couple of really good youtube videos showing us what we will need to do which I have now watched numerous times.
If we don’t managed to get the hand assembled because of the screw holes that we are having difficulty with, I will still have the pieces to show for hand-in and I will continue to work on getting the hand done once this project is finished.. even if that requires me to re print some pieces. I am feeling pretty certain that it won’t come to that though.
Part two developement
I have given some more thought towards how I might want to present this project and have come to the conclusion that I would like to ask a child to come along to the presentation and actually show everyone them using the hand. I have a family who I have asked and atleast one of the kids should be able to come along and don’t mind helping me out with this. I am also going to take some photos of them wearing the hand, focusing on the different movements they can do and grip that they have. For example: peace sign, fist pump, flexing hand back wards and forwards, holding a cup or other object and writing using a pen. These are just some that I have come up with as possibilities. I don’t know if i will print these photos yet or just put them on my blog but at the presentation I would like the child to show those same movements that I plan to take photos of.


